Lazy Day English Toffee S'Mores Bars

God Bless Chocolate!
These are favorite "little smackerals" (Winnie The Poohism's) of both of my daughter's and their friends. I even make these for bake sales, catering, gifts...they are a sell out in many, many ways!
These are oozing dark chocolate sandwiched between a buttery, lightly sweetened gluten free graham crust and heaping mounds of toasted, tender masrshmallows. Just look at them! How could you not want to just reach right in and get one?!
The initial recipe for these that was given to my daughter Candice was good, but way to sweet. I really love chocolate, in case you haven't noticed. I love fabulous frosting and icings and cookies, cakes, pies.....But I really don't want things so sweet when you bite in it that it causes pain, and my teeth protest. Overly sweet, cloying food is not what I'm after. I'm sure that's why I prefer dark to bittersweet chocolate over semi sweet or milk. When I make baked goods that need an icing I'll do it, but just enough to enhance what's already there. If you have to cover the item with frosting or icing to hide how badly it looks, or tastes, I'm thinking that either a skill needs to be fostered or a career change must be considered. If it's bad it's just bad. Don't try to cover it up, just throw it out and start again!
So with that in mind, I make these naughty things absolutely irresistible! I do make these for both gluten free and regular. This recipe is obviously for gluten free, but you can substitute for non gluten free needs. There are so many flavor combinations for these, I hope you experiment and come up with your families favorite. It's great at Christmas time when you can get peppermint chocolate chips.
I like several different flour blends that you could easily use, you may want to try them all eventually:
artofglutenfreebaking.com
americastestkitchen.com
glutenfreegirl.com
Lazy Day English Toffee S'Mores Bars
***This recipe is divided by color, crackers and crumb crust first, and after those the topping and final baking.
****If you don't want to use the ground whole psyillium husks you'll need to reduce the iced water to 3-5 Tablespoons, everything else remains the same.
Ingredients For Gluten Free Graham Cracker Dough (makes enough for one regular tray of S'mores bars and a tray of cookies
2 cups gluten free flour blend (I used America's Test Kitchen's new blend (ATK))
1/4 cup sweet rice flour (also known as Mochiko in Oriental Stores)
 ****2 Tablespoons ground whole pysllium husks (this one is steamed into flakes, and the whole husk has been ground, this gives a lot of baked goods some firmer substance)
1/2 cup dark brown sugar
3 Tablespoons ground cinnamon (yes, this much!)
1 teaspoon baking powder
1/2 teaspoon xanthan gum
1 teaspoon Kosher salt, If using table salt cut the amount in half
7 Tablespoons cold unsalted butter, cut into 1/2 inch pieces
7 Tablespoons iced cold water
3 Tablespoons honey
1 teaspoon vanilla extract
cinnamon and sugar for sprinkling on the tops of the unbaked cracker dough
Directions for the graham crackers:
Pre-heat oven to 325°F.
Spray two flat cookie sheets, or jellyroll pans with non-stick spray, line them with parchment paper and lightly mist the paper with the non-stick cooking spray.
You will need two 1 gallon sized zip lock baggies.
1. In a stand mixer bowl mix together the flour blend plus the sweet rice flour, dark brown sugar, ground whole psyllium husk, baking powder, xanthan gum, and salt until combined, about 30 seconds.
2. Using a pastry blender or two forks, cut the butter a few pieces at a time into the flour blend, the result should be like small peas.
3. With the mixer on medium low speed, drop in the cold water 1 Tablespoon at a time - (you only want the mixture to be nicely moist but not wet, it should stick together but not stick to your fingers), the honey and vanilla extract. The dough will start coming away from the bowl and forming a ball. IF the dough is too dry you can add more ice cold water 1 teaspoon at a time. The dough should only be moist.
4. Remove the dough from the bowl, and weigh it, divide the dough into two equal portions and place one portion into each of the zip lock baggies, and zip it closed. Press out all of the air, then using a rolling pin roll the dough out inside the baggie, this give you pretty even dough! Transfer the dough block baggy onto an unlined cookie sheet. Carefully unzip the baggy, then using scissors, cut down one side and across the bottom. Open the baggy now to expose the dough block.


Ingredients For Gluten Free Graham Cracker Crumb Crust: use the crackers you made from the recipe above.
1 1/2 cups of pulsed graham crackers (one tray of cookies)
6 Tablespoons unsalted butter, melted (you may need an extra one, you are looking for the crumbs to stay together when pinched)
2 teaspoons sugar
Directions For Graham Cracker Crust:
Line one 9" x 13" baking pan - such as jelly roll pan with parchment paper, you definitely need sides on the baking pans, and be sure to spray the bottom and all four sides with the non-stick cooking spray.


Increase the oven temperature to 350°F.
Ingredients for The S'mores Oozing Chocolate - and Marshmallow Topping-Yumminess!
8 ounces recipe ready GF graham cracker crumbs (from the recipe above)
18 ounces dark chocolate chips
8 ounces Heath Bits 'o' Brickle pieces,
8 ounces mini marshmallows
Final Directions For Assembly and Cooking
8. When you are happy with the ratio of butter to crumbs, scoop the crumbs onto the prepared pan, then with your fingers, push and move the crumbs around until you have covered all of the surface. Press down with your hands to firm the crust for baking.


9. Spread the chocolate chips around onto the crust surface,

layer the Brickle Bits over the chocolate chips,

and then layer the marshmallows on top of the chocolate chips and Brickle Bits.


Bake in the oven for about 40 minutes. The tops of the marshmallows should be a light toasted brown, puffed up together and very oozy when pushed.


Remove from the oven and let the pan come completely to room temperature. Trying to cut these while warm can make a huge mess. They will still be melty, oozy, gooey, and fabulous at room temperature, so let them cool at least 2 hours.
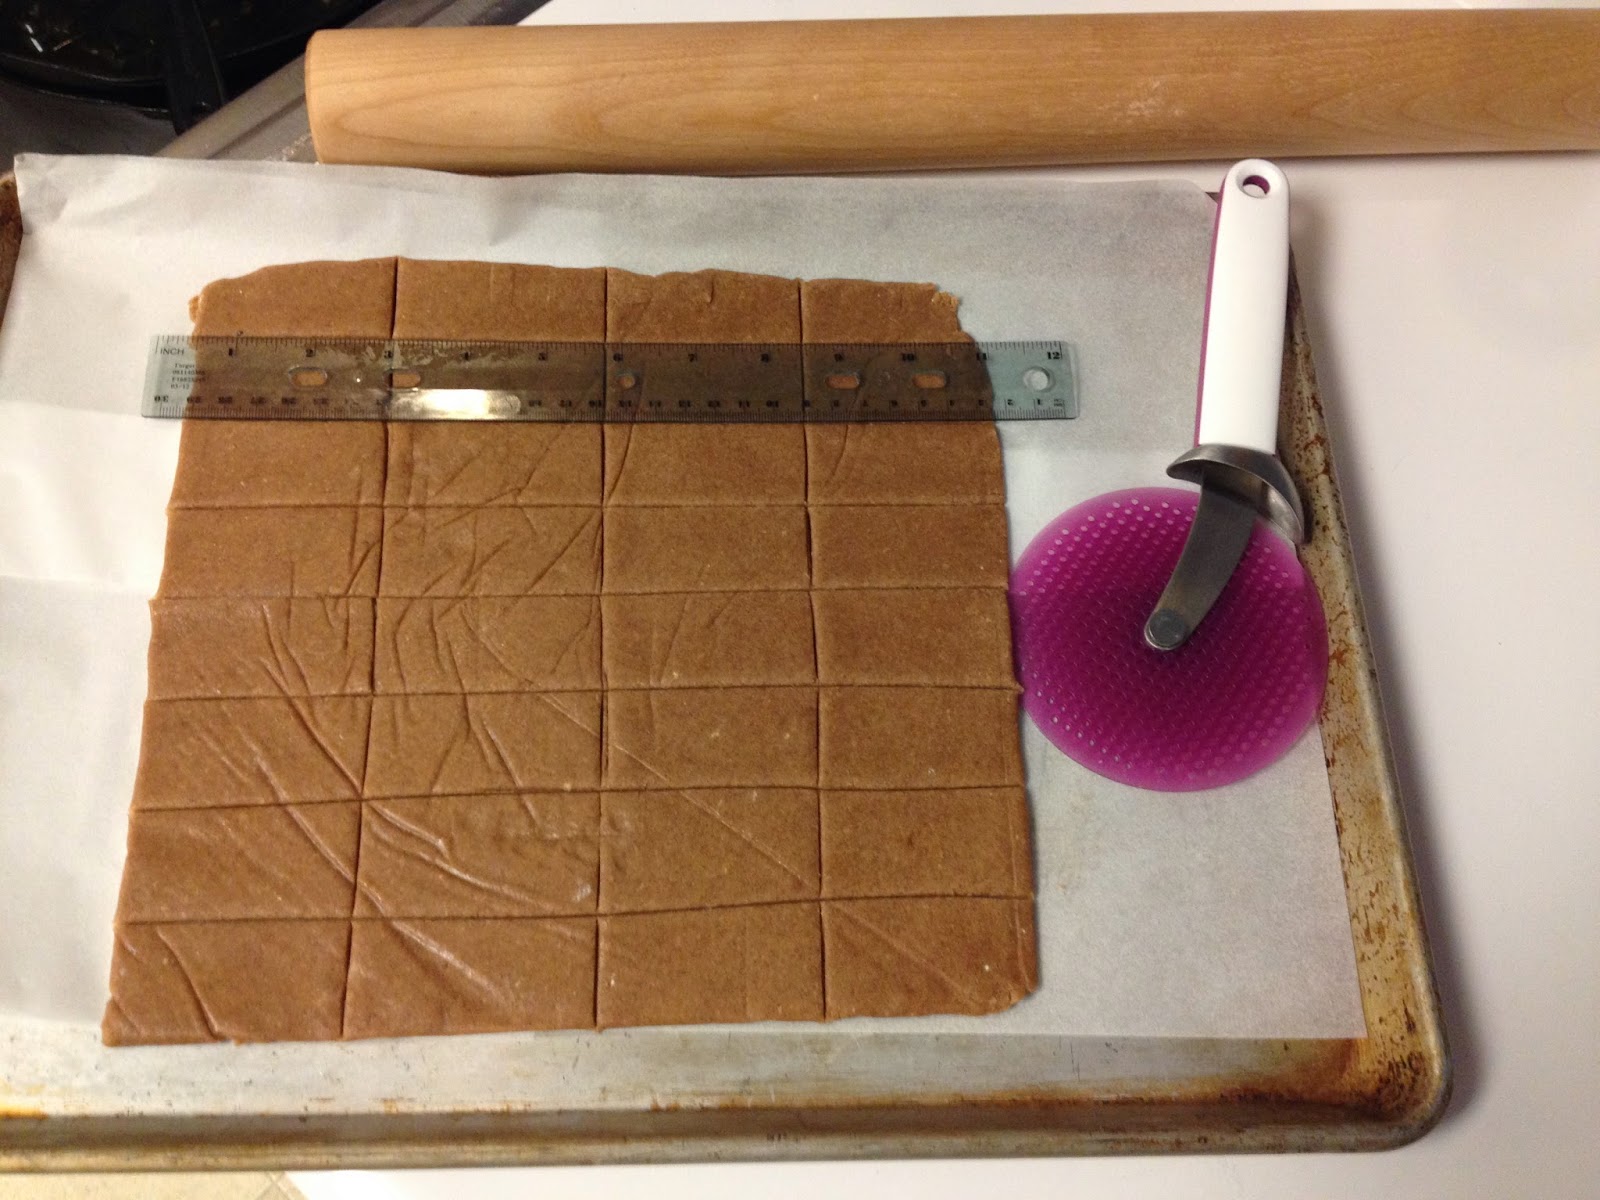
10. Once the pan has cooled, slip a knife around the non-handled edges, then gently but firmly grasp the handles of paper and lift the slab onto your cutting surface. I like to measure them and knick the dough with a knife to mark where the cutter should go. I have a large stainless steel pizza cutter that rocks, it's about 15" long. There are a variety of manufacturers for this on the internet, or use the longest
11. Serve! Eat! Yum! When storing it's best to let them sit out uncovered for at least 10-12 hours. This lets the chocolate and marshmallows firm up so they can be refrigerated. I store these in a 9" x 13" tightly covered plastic container, separating each layer with waxed or parchment paper. Of course all of that depends on if there are any left!
Enjoy!

No comments:
Post a Comment