Apple Pizzas!

It's harvest time for apples.
Technically it's supposed to be cooling off considerably, weather wise since this is officially "Fall". Unless you live in Southern California! We've had a couple of mid to high 70's the past 7 days or so. Whoopee! The fan is on in our bedroom 365 days a year. Some of our neighbors are still using their air conditioner 24 hours a day and even when our nights are '"frigid" in the 60's. Maybe those still using their a/c's are hoping to provide themselves with a bit of artificial "fall-Like" weather.
I have a plethora of recipes for warming up body and soul, but I have to be desperate to use them. My constant personal-power surges can prevent me from even enjoying a warm cup of tea. It's pretty much like the warm food or drink is the fuel as catalyst. The constant stirring is my bodies botched attempts for the tamping of my own coals. Once combined and I self-combust!
So I have to watch the regional weather temperatures daily to decide what's on the menu. Today it's sunny, breezy and maybe 78℉. it would be a near perfect day to go to Disneyland. A perfect day would be overcast and nicely cool - low 70's. That way one is not getting sunburned, or over heated.
But today's forecast for evening temperatures is just about perfect for a "fall" dessert, which is even sublime eaten for breakfast or snack, and come to think of it, occasionally for dinner. Oh heck, eat it when ever you want!
I've been making this treat since Candice was about 3 years old. I started making them with her pre-school class. Each child was given a square of foil with their name written on it, one canned biscuit, 4-6 slices of apples, one pat of butter, a couple tablespoons of brown sugar, a shake or two of ground cinnamon (if they wanted any), and about an ounce of cheddar cheese, (if they wanted any.) I showed them how to shape their biscuit into a pizza shape and put it on the foil square, and demonstrated how the goodies were added - of course all of this was a mere suggestion as I really wanted them to express themselves in how they wanted their own to be. And boy did they! All of their pizzas were certainly personal works of edible art.
When they were done with their creations I gathered them up on baking pans and headed to the school kitchen where I baked them to perfection. The children were always so glad when I came back with their little masterpieces, knowing that they were going to eat them right then and not have to wait until they got home.
Now Lela's Mommy - Candice, will need to take over for her schooling. : ( Sad for me, but happy that Candice will get to bring such simple joys such as apple pizzas to a whole new era of children.
Chelsea still has some time left before she too will take over for her children. What a cool and yummy "legacy" to live!
Chelsea still has some time left before she too will take over for her children. What a cool and yummy "legacy" to live!
Today we're going to make an adult version, which you can easily tone down if you wish. It's probably not as exciting as it sounds! But non-the-less, let's get started! now I'm hungry!
Apple Pizzas
1 recipe of the Pizza Dough below will make 12 minis or 2 large pizzas
Equipment needed:
-pizza stone pre-heated it @ 500℉ for at least an hour
OR
-two baking sheets - these will be doubled up which enables the bottom of the crust to brown and bake without burning, pre-heated for about 20 minutes @ 500℉
-1 sheet of parchment paper per pizza(s), lightly sprayed with non-stick cooking spray
Pizza DoughIngredients:
Non-stick cooking spray
Dry Ingredients:
white rice flour 8 ounces
tapioca flour 4 ounces
xanthan gum 1 teaspoon
unflavored gelatin 1/2 teaspoon
egg replacer 1 teaspoon
sugar 1/4 cup
psyllium husk powder* 2 1/2 Tablespoons *essential for that wonderful "wheat bread" chew, the dough simply won't be the same without it
dry milk powder 1/4 cup
*Kosher salt 1-1/2teaspoon *if using table salt cut amounts in half
dry yeast granules 2-1/2 teaspoons 2 envelopes rapid rise or pizza style yeast
◆ about 4 Tablespoons extra flour blend, or tapioca flour/starch to dust your hands with for forming the dough into the pizza round(s)
Wet Ingredients:
eggs 2 large
OR
dry egg replacer = 1-1/2 teaspoons Energy Egg Replacer plus 2 Tablespoons warm water equals 1 large egg
olive or vegetable oil 2 Tablespoons
vinegar 1 teaspoon
warm water 110℉ *1 cup (+ ) *add the extra in step #2 only if needed
◆ extra oil to brush the dough edge before baking - about 1 Tablespoon

Crust Directions: You will pre-bake the crust for 10 minutes in step 6.
1. Blend the dry ingredients together in a medium bowl. Set aside.
2. Combine the wet ingredients, in the bowl of your stand mixer. Turn the speed to the lowest setting and spoon in the flour mixture about 1/3 at a time. Add more water if needed to get a very moist pliable dough. You don't want the dough to be flaky or dry, nor sopping wet. Beat on medium-high speed for 6 minutes. This helps to give it some elasticity which acts similar to gluten, and allows the flour granules to hydrate leaving you with a smooth mouth feel instead of grainy or gritty.

Turn oven down to 400℉ before baking.
3. Divide the dough into 2-12 sections and working with one at a time, plop the dough round onto the sprayed sheet of parchment paper. Give it a few "kneads" to form into a rough round, or use a rolling pin. Spray one piece of plastic wrap and place it sprayed side down on top of the dough rounds. Place them somewhere warm and let it sit and rise about 20-30 minutes. I doesn't really need to double, just increase some as it will puff out in the oven.
4. Once the dough has risen sufficiently, remove the plastic wrap and place the parchment paper holding the dough directly onto the pizza peel. Dip your fingers into the flour blend and start pushing on the dough to form a bit flatter circle. While forming be sure to press the dough leaving the outside edge thicker. This helps form a "stop" so your topping(s) don't run off, and it looks good too, giving your creation a professional touch! Now you will need to dock the dough with a knife or a professional docker. Simply poke 8-10 knicks into the top of the dough.
5. Place the two baking pans directly one on top of the other, (nestled), then grasp the parchment paper and slide it with the dough onto the doubled baking pans, and place into the oven.
6. Pre-bake the dough round(s) for 10 minutes. Remove from oven, turn oven down to 425ºF .
Let the dough cool down about 10 minutes, then you can start adding your toppings. I've included the types and amounts that I used, but you are welcome and encouraged to make it your own by adding what you and your family like.
 Building your pizza and baking it:
7. a. Brush the Calvados (or apple juice or cider) all over the top of the pizza dough round leaving about 1/3"-1/2" crust all around.
b. place the apple slices around making sure every bite will have some,
c. sprinkle brown sugar over all
d. sprinkle entire surface with the ground cinnamon or pumpkin pie spice
e. drizzle some melted butter across the top of the apples, and lightly "paint" the crust edges
f. top with grated cheddar cheese
g. sprinkle a bit more Calvados over all. (Or you can use apple juice or cider)
 6. Bake the pizza at 400º for 20-40 minutes for large pizzas, and 11-15 minutes depending on the size of your "mini's" you've chosen, or until the crust edge is golden brown and toppings are hot and bubbly. Remove from the oven and let the pizza sit about 10 minutes; if you can. Then cut and eat.
IMPORTANT NOTES:
**Energy Egg Replacer DOES NOT have the nutritional value of egg products nor are there any egg products or derivatives in Energy Egg Replacer. And I was not paid to provide you with this information.
 Pizza Toppings:
For 2 Large Pizzas:
Equipment you'll need:
2 squares of parchment paper or foil
1 pizza stone
OR
2 large cookie sheets
lemon (acidic) water-about one teaspoon lemon juice per half gallon water-prevents apples from turning brown
3-4 Tablespoons Calvados (apple liqueur)
OR
3-4 Tablespoons apple juice or cider
2-3 assorted baking apples (Pink Ladys, Granny Smiths, yellow delicious, Jonagolds...), sliced paper thin, and dipped into the lemon water
pinch of salt
1/4 cup unsalted butter, melted
1/2 to 3/4 cups brown sugar
1-3 Tablespoons ground cinnamon or ground pumpkin pie spice
1-1/2 cups grated sharp cheddar cheese
Assemble your ingredients and lay them out in an assembly line on your counter. Leave enough room between those and the front of the counter, so you can slide the pizza crusts along gathering the goodies you'd like on each masterpiece.
 Once assembled, slip the parchment with the prized pizzas right onto the pizza stone or doubled baking pans.
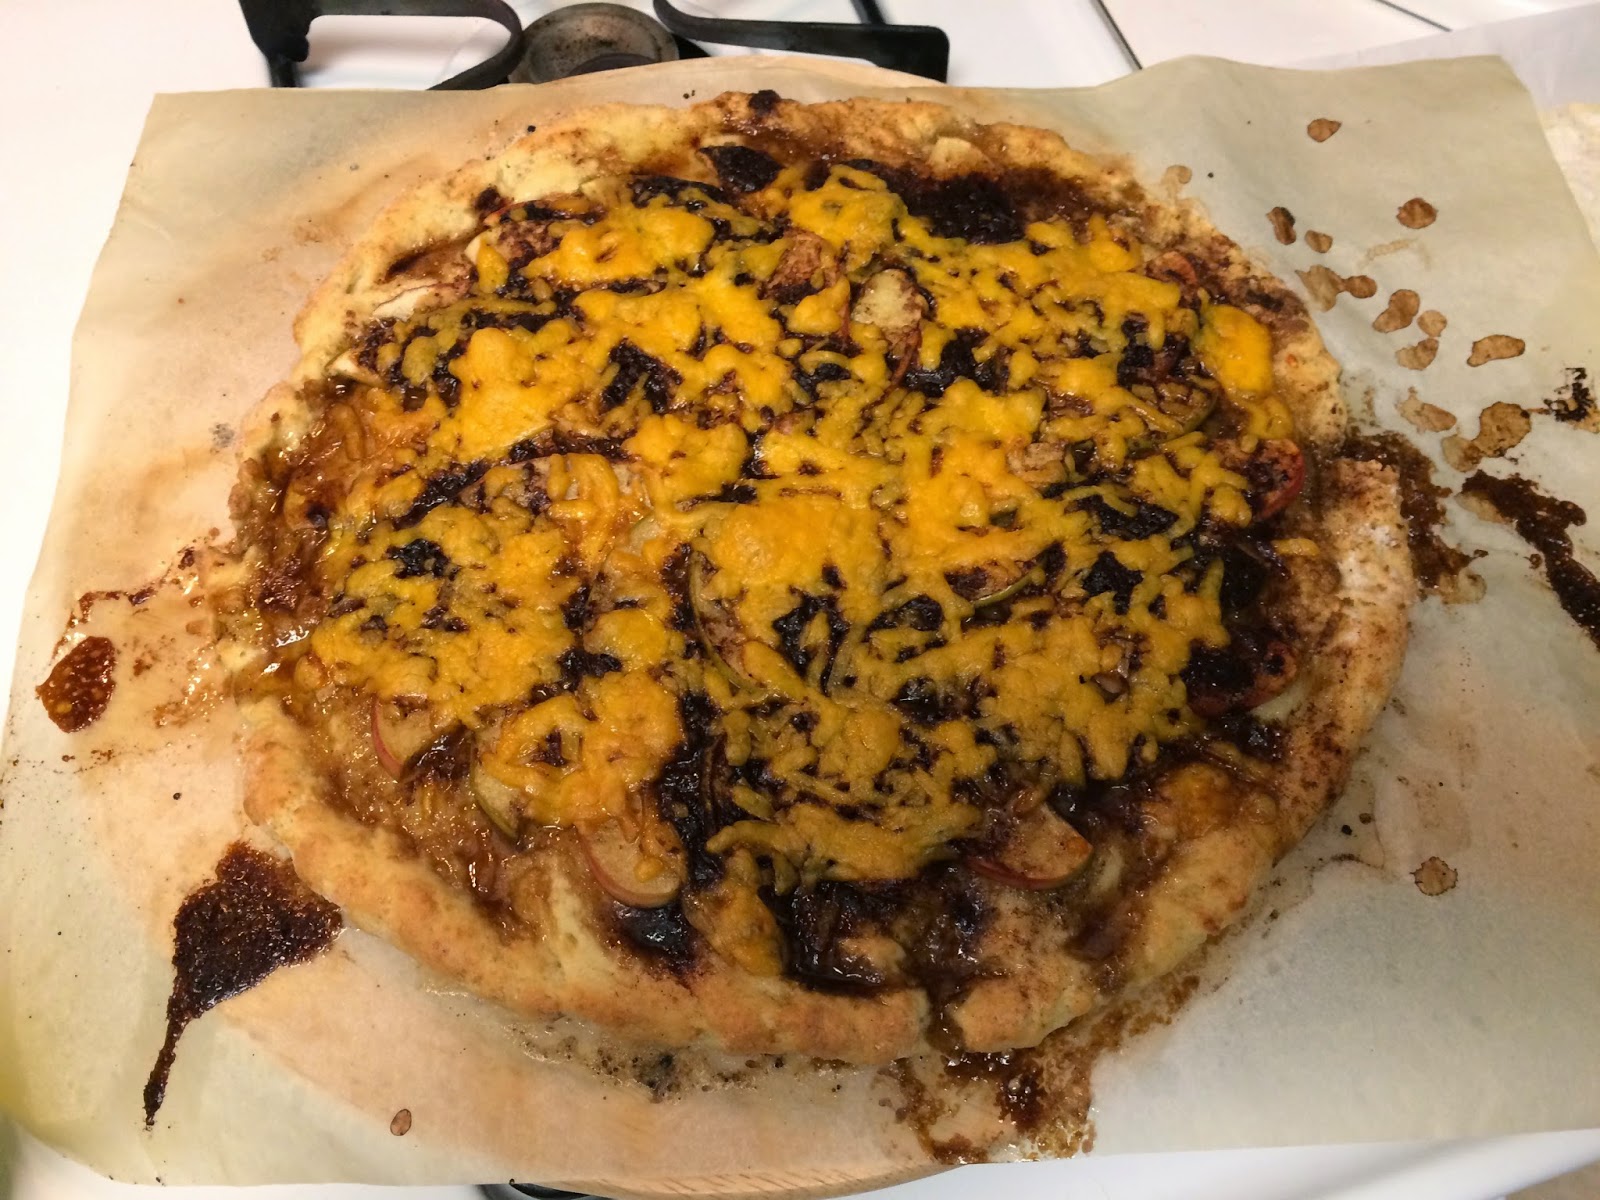
These large pizzas will bake between 20-30 minutes and little pizzas will bake about 11-15 minutes each. You want your pizzas to be hot and cooked through the middle, so use a long cooking fork and poke through the center of the apples and into the crust. If it slides through easily, they are done. If there is still some resistance, then cook them a bit longer-say in 5 minute increments.
Once removed from the oven, let the pizzas sit and rest about 5-10 minutes. Then you can slice them into 6-8 slices per large pie.
 These would also be great using different types of pears!
I am not paid to promote any products edible or otherwise on this website. I merely provide you with the information as to the products I personally used so you will experience the same or close to the results I did. ; }
Enjoy!
Equipment needed:
-pizza stone pre-heated it @ 500℉ for at least an hour
OR
-two baking sheets - these will be doubled up which enables the bottom of the crust to brown and bake without burning, pre-heated for about 20 minutes @ 500℉
-1 sheet of parchment paper per pizza(s), lightly sprayed with non-stick cooking spray
Pizza DoughIngredients:
Non-stick cooking spray
Dry Ingredients:
white rice flour 8 ounces
tapioca flour 4 ounces
xanthan gum 1 teaspoon
unflavored gelatin 1/2 teaspoon
egg replacer 1 teaspoon
sugar 1/4 cup
psyllium husk powder* 2 1/2 Tablespoons *essential for that wonderful "wheat bread" chew, the dough simply won't be the same without it
dry milk powder 1/4 cup
*Kosher salt 1-1/2teaspoon *if using table salt cut amounts in half
dry yeast granules 2-1/2 teaspoons 2 envelopes rapid rise or pizza style yeast
◆ about 4 Tablespoons extra flour blend, or tapioca flour/starch to dust your hands with for forming the dough into the pizza round(s)
Wet Ingredients:
eggs 2 large
OR
dry egg replacer = 1-1/2 teaspoons Energy Egg Replacer plus 2 Tablespoons warm water equals 1 large egg
olive or vegetable oil 2 Tablespoons
vinegar 1 teaspoon
warm water 110℉ *1 cup (+ ) *add the extra in step #2 only if needed
◆ extra oil to brush the dough edge before baking - about 1 Tablespoon
I made a triple batch of my Pizza mix! We go through it for so many things!
Crust Directions: You will pre-bake the crust for 10 minutes in step 6.
1. Blend the dry ingredients together in a medium bowl. Set aside.
2. Combine the wet ingredients, in the bowl of your stand mixer. Turn the speed to the lowest setting and spoon in the flour mixture about 1/3 at a time. Add more water if needed to get a very moist pliable dough. You don't want the dough to be flaky or dry, nor sopping wet. Beat on medium-high speed for 6 minutes. This helps to give it some elasticity which acts similar to gluten, and allows the flour granules to hydrate leaving you with a smooth mouth feel instead of grainy or gritty.
Cover this dough with plastic wrap and a clean dish towel.
Place in a warm are to rise, it should be doubled in size.
Turn oven down to 400℉ before baking.
3. Divide the dough into 2-12 sections and working with one at a time, plop the dough round onto the sprayed sheet of parchment paper. Give it a few "kneads" to form into a rough round, or use a rolling pin. Spray one piece of plastic wrap and place it sprayed side down on top of the dough rounds. Place them somewhere warm and let it sit and rise about 20-30 minutes. I doesn't really need to double, just increase some as it will puff out in the oven.
4. Once the dough has risen sufficiently, remove the plastic wrap and place the parchment paper holding the dough directly onto the pizza peel. Dip your fingers into the flour blend and start pushing on the dough to form a bit flatter circle. While forming be sure to press the dough leaving the outside edge thicker. This helps form a "stop" so your topping(s) don't run off, and it looks good too, giving your creation a professional touch! Now you will need to dock the dough with a knife or a professional docker. Simply poke 8-10 knicks into the top of the dough.
5. Place the two baking pans directly one on top of the other, (nestled), then grasp the parchment paper and slide it with the dough onto the doubled baking pans, and place into the oven.
6. Pre-bake the dough round(s) for 10 minutes. Remove from oven, turn oven down to 425ºF .
Let the dough cool down about 10 minutes, then you can start adding your toppings. I've included the types and amounts that I used, but you are welcome and encouraged to make it your own by adding what you and your family like.
7. a. Brush the Calvados (or apple juice or cider) all over the top of the pizza dough round leaving about 1/3"-1/2" crust all around.
c. sprinkle brown sugar over all
d. sprinkle entire surface with the ground cinnamon or pumpkin pie spice
f. top with grated cheddar cheese
g. sprinkle a bit more Calvados over all. (Or you can use apple juice or cider)
IMPORTANT NOTES:
**Energy Egg Replacer DOES NOT have the nutritional value of egg products nor are there any egg products or derivatives in Energy Egg Replacer. And I was not paid to provide you with this information.
For 2 Large Pizzas:
Equipment you'll need:
2 squares of parchment paper or foil
1 pizza stone
OR
2 large cookie sheets
lemon (acidic) water-about one teaspoon lemon juice per half gallon water-prevents apples from turning brown
3-4 Tablespoons Calvados (apple liqueur)
OR
3-4 Tablespoons apple juice or cider
2-3 assorted baking apples (Pink Ladys, Granny Smiths, yellow delicious, Jonagolds...), sliced paper thin, and dipped into the lemon water
pinch of salt
1/4 cup unsalted butter, melted
1/2 to 3/4 cups brown sugar
1-3 Tablespoons ground cinnamon or ground pumpkin pie spice
1-1/2 cups grated sharp cheddar cheese
Assemble your ingredients and lay them out in an assembly line on your counter. Leave enough room between those and the front of the counter, so you can slide the pizza crusts along gathering the goodies you'd like on each masterpiece.
These large pizzas will bake between 20-30 minutes and little pizzas will bake about 11-15 minutes each. You want your pizzas to be hot and cooked through the middle, so use a long cooking fork and poke through the center of the apples and into the crust. If it slides through easily, they are done. If there is still some resistance, then cook them a bit longer-say in 5 minute increments.
Once removed from the oven, let the pizzas sit and rest about 5-10 minutes. Then you can slice them into 6-8 slices per large pie.
I am not paid to promote any products edible or otherwise on this website. I merely provide you with the information as to the products I personally used so you will experience the same or close to the results I did. ; }
No comments:
Post a Comment